
Part 1
Let's take a quick look at where we left off yesterday:
4 Tommy, Runaway
4 Electric Eve, Live Wire
3 Artie, Arthur Maddicks
4 Tar Baby, Adhesive Ally
3 Leech, Inhibitor
1 Black Cat, Master Thief
4 The Creeper, Jack Ryder
1 Caliban, Mutant Bloodhound
1 Ricochet, Johnny Gallo
3 Storm, Leader of the Morlocks
1 Hump, Servant of Masque
1 Will O’ The Wisp, Jackson Arvad
4 Marrow, Gene Nation
3 Scaleface, Dragon Lady
1 Callisto, Morlock Queen
Key Plot Twists
That’s thirty-nine characters, so we will certainly have to trim down later. For a curve deck with a single set of four search cards, I tend to aim for around thirty-two characters as a starting point. I will make adjustments to take into account factors like extra card drawing once the resources are sketched out. I’m happy to leave that as a “wish list” for now and come back to it once we’ve worked on our resource selection.
The move to Silver Age has the potential to make a big difference here, both in terms of the cards available and what we want the cards in our deck to do. First of all, it’s worth mentioning the four key Morlocks-stamped cards that help define the evasion archetype; we will certainly play them. Devon was packing the full sixteen here, and it’s likely we’ll stay at or close to that number.
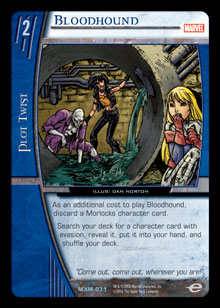 Bloodhound is the first plot twist you would add four copies of to a deck like this. It searches for every character in your deck but one, and the vast majority of your characters can be discarded to it. Without Bloodhound, an evasion deck would be significantly less consistent and would either be forced to team-up Morlocks with a team with a search card or play significantly more off-team characters and Enemy of My Enemy (not that being able to play Enemy of My Enemy is a bad thing).
Backs Against the Wall is great for those attacks where you simply can’t afford to take the breakthrough or evade out of the attack and let the opponent swing in again. The threat of it is potent, as well; it forces your opponent to attack in an order he or she might not otherwise be happy with to avoid a key character being prevented from getting an attack through at all.
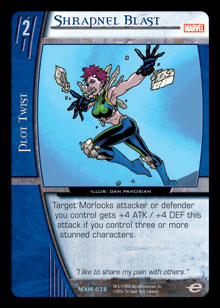
Shrapnel Blast, on the other hand, is less subtle. But then, with a stat modifier this large, who cares about subtlety? It’s all very well to dance around feinting and parrying, but when your opponent has no option but to walk right into the sledgehammer to the temple, it would be almost rude not to take the opportunity. Against many decks, even the threat of a Shrapnel Blast will have your opponent sweating as he or she tries to work out attacks for the turn. When you manage to save up two for Marrow for the opposing turn 5 attacks, skulls get cracked. Just don’t forget about BWA HA HA HA HA!.
Retribution is your secondary pump card, and it too is a powerful one. Although it lacks Shrapnel Blast’s potential for brickwalling, it does double duty as both a Nasty Surprise and a +4 or +5 ATK pump on the turns you’re looking to end the game. It’s not as flashy as Shrapnel Blast, but it also requires less of a set-up.
Locations
The Morlocks have a quartet of team-stamped locations. One, The Hill, was included in the original build primarily for its card-drawing power, although even situational combat modifiers are always welcome to supplement already decent cards. However, The Hill won’t be making the cut in my final suggested build. The reason, in a word, is threshold. A threshold cost of 4 means that if we’re hoping to end the game on turn 6, we have to flip The Hill on turn 4 for it to do better than break even on cards. If we decide that we really need extra card drawing on top of The Creeper and Millennium, Birthing Chamber flips a turn earlier and, not insignificantly, can be used in the build phase rather than only in recovery.
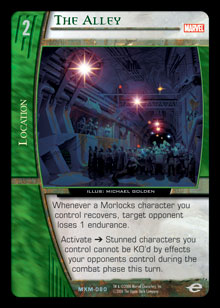 The Alley is, to me, much more interesting. It has two quite distinct effects. The first is a burn ability that should build up to quite a significant amount if flipped early. Consider that on turn 3, you may be recovering four characters. That’s a Die for Darkseid already! If flipped early, The Alley can easily be responsible for between 15 and 20 points of endurance loss, shortening the game and offsetting the pain of evading our characters quite nicely. The other reason to run The Alley is that it plugs one of the real vulnerabilities of our evasion characters—Fatality, Flawless Victory. Fatality sees plenty of play in Silver Age, and if left unchecked, she can cause real problems. One answer to her is simply to flip The Alley and activate, and another potential solution is described below.
Incidentally, if you have a Morlock character in play and The Creeper recovers, you will trigger The Alley, thanks to rule 502.3:
502.3 Triggered powers use the game state immediately after an event to determine whether they could have triggered off that event and whether or not they did. Powers that trigger off an object becoming stunned, leaving play, or causing breakthrough are an exception to this rule. (See rule 502.4.)
Sewer System and Subterranean Sanctuary both have useful abilities, but neither is powerful enough to make the cut in a deck like this. Sanctuary is too defensive, and while Sewer System’s access to the hidden area is useful, we can’t search for it and don’t need it enough to run multiple copies. It doesn’t help that the secondary ability is useless to us.
Other Resources
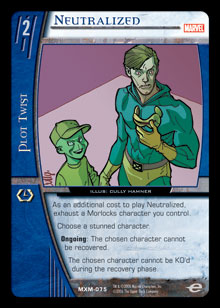 Mutant Massacre is a powerful card, but it has some unique problems for Silver Age. Namely, Huntress, Reluctant Queen and Star of the Show. Huntress can negate Mutant Massacre, and Star of the Show can prevent you from ever targeting a stunned character. However, there is an alternative—the generally overlooked Neutralized (Morlock-stamped, rather than Mutant) has one significant advantage over the majority of KO or pseudo-KO effects. It doesn’t target the stunned character. As such, it’s virtually impossible to stop (unlike Mutant Massacre) with a recovery effect; Neutralized on the chain is the only real option, and even then, if your opponent has another stunned character, you can choose that character instead. While you won’t be able to auto-win by KO’ing your opponent’s Ahmed Samsarra, you will be able to lock him or her out of the game completely while bypassing the protection of Huntress, Reluctant Queen. Against X-Statix, you can respond to Spin Doctoring with Neutralized, preventing the opposing character from recovering and allowing you to attack directly.
This is a good example of a case where you have to take a good card that’s been in pretty much every build of a deck to date and be prepared to drop it for an “inferior” card thanks to metagame pressures. If we were simply building a Morlocks deck in a vacuum, Mutant Massacre might well make it. For the current Silver Age metagame, however, Neutralized simply does what we need while being much harder to disrupt than Mutant Massacre. Neutralized also provides our secondary answer to Fatality; if we have the initiative on turn 6, we can send our 4-drop into her, and then use Neutralized to lock her down stunned.
Looking at the less standard plot twists in Devon’s original list, we see Meltdown, Good Samaritan, and War of Attrition. Good Samaritan is the card I want to talk about first, as I think it’s a good place for the switch to Silver Age to make a difference by bringing in a relatively obscure card from an older set. That older set just happens to be the birthplace of the evasion mechanic, although the card itself is as much a help for swarm decks in general as it is for evasion decks specifically. The card? Team Spirit.
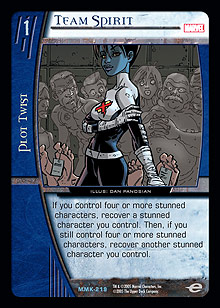 If you’re looking for something that will make your opponent’s heart sink after he or she finally takes your team down on turn 5, Team Spirit is it. While Good Samaritan costs you a character on the board for a minor breakthrough prevention effect tacked on to your recovery, Team Spirit not only has the potential for recovering multiple characters mid-attack to fuel a completely unexpected Backs Against the Wall, but it also, like Neutralized, doesn’t target. That means no BWA HA HA HA HA! from one of the more popular aggressive decks in the format, a play that could leave a Good Samaritan reeling. The fact that you can allow three of your opponent’s attacks to conclude without evading on turn 5 means that even without a Backs Against the Wall, you’re taking a lot less damage because you get to reinforce attacks and stun back instead of just evading out of them and letting the attacker ready. After you evade your 1- and 2-drops on turn 5, trading stuns with your opponent’s characters with The Creeper, Storm, and Marrow will look like a pretty good deal to him or her. The Team Spirit sucker-punch that recovers your entire board for your initiative on turn 6 and leaves your opponent with just a 5-drop (assuming no Neutralized) will be very satisfying indeed.
Moving on, we come to War of Attrition. Although generally a quite useful card, it seems that the main reason for its inclusion is Absolute Dominance. Absolute Dominance is extremely effective at shutting down the evasion strategy, removing the cheap evasion characters that fuel your other effects from the game. Although Absolute Dominance is extremely powerful against us, that alone isn’t a reason to run cards you otherwise would not. It’s easy enough to do—you have a deck based around a particular strategy, and that strategy happens to be hosed by a particular card. However, it’s important to keep that threat in proportion. Absolute Dominance is scary to think about, yes, but will anyone actually play it? In Silver Age, Fatality, Flawless Victory has turned out to be the far more popular “reprint” of Total Anarchy, as she can be searched out with Enemy of My Enemy. War of Attrition hurts us, too, as we want The Alley face up in the resource row.
Taking all this into account, I would suggest that if you feel the need for a resource-replacement effect in a deck like this, go elsewhere, probably to Transmutation. But if Absolute Dominance is the big worry, then you’re best advised to grit your teeth and accept that if you happen to be playing against a rogue deck with Absolute Dominance, you will have a hard time. With none of the most-played decks in the format running it, you need to balance the effectiveness of the card against the chance of it actually showing up in any given event, let alone in a deck you get matched with. Fatality is more of a worry, and we will be playing multiple copies of The Alley to help against her (importantly, the burn ability makes the card excellent even if Fatality never shows).
Meltdown is another metagame-specific card, but it’s more justified. It’s only the ability to remove equipment that makes this card interesting to us. That ability has proven a powerful one in Silver Age, taking out Nth Metal, Knight Armor, Flamethrower, and Fate Artifacts for no additional cost. For now, however, I’m taking them out. Good Guys needs them to avoid losing Nth Metal advantage in the mirror and to stop Knight Armor from preventing stunbacks. Other decks play them to take out Amulet of Nabu on suited-up Squadron Supreme characters. However, Morlocks are in the enviable position of having Backs Against the Wall to throw a wrench in the “single huge attacker” Fate Artifact plan. There’s also Retribution and Shrapnel Blast followed by Neutralized to stun back the Fate attacker and strand the Fate Artifacts by preventing the character from recovering (Dr. Fate’s Tower can’t transfer equipment from a stunned character). The ability to remove Nth Metal before you let an attack become legal would be nice, but I’m unconvinced that the slots could not be better used elsewhere.
For a first draft, I’m going to add four copies of each desired resource, and then add the characters worked out earlier and determine how many cards need to be cut. With no resource search, we want to steer clear of trying to add one or two copies of tech cards because our chances of drawing them in only the relevant matches are very slim.
Final Cuts
Adding twenty-eight resources to our thirty-nine characters from earlier, we come to sixty-six cards, so we need to make six cuts. The first cut will be Ape, Metamorph. Morlock Evasion is perfectly capable of going off curve, and against one of the key decks in the format, Deep Green, we will often want to go off curve to drop Ricochet in order to play around Spider-Man, The Amazing Spider-Man. We also have a perfectly serviceable second 6-drop in the form of Callisto.
At this point, I retreated to Excel to have a look at some of the hard numbers for the deck, specifically our chances of hitting the early drops. Given the importance of hitting our full curve, we will be tending towards mulliganing for Artie, Electric Eve, and our 2-drops. As such, I wanted to ensure that any cuts at that point on the curve didn’t have too big an impact on the chances of hitting our drops. As it turns out, the chance of hitting Artie or Eve with a mulligan and six copies total is 68%. We get a 7% increase from the seventh copy and another 5% from the eighth. We’d like to fit a seventh 1-drop in if possible, but for the moment, we’ll stay at six. After all, it’s not like paying a resource point for Tommy is actually bad; it simply means that we’re not abusing the evasion mechanic to the utmost. Our odds of hitting a 1-drop, including Tommy, on turn 1 are very good—86%.
Moving on to 2-drops, dropping from twelve ways of finding a 2-drop (eight 2-drops plus four copies of Bloodhound) to eleven or ten costs us about 3% per card from 85%. A copy of Leech, Inhibitor and the singleton Black Cat will go, as they are the 2-drops likely to have the least impact on the board. Leech has a useful ability, but his 2 ATK and discard cost put him firmly in second place behind Tar Baby, who can also deal with key cards like Dr. Light, Master of Holograms and Slaughter Swamp. Black Cat is simply too small in an environment without the kind of decks that Black Cat is best at hurting (quick combo decks or more controlling decks that rely on early plot twists to hit their drops and preserve their board). I would only really expect Black Cat to have an impact in the current Silver Age if we have the even initiatives against Deep Green, and even then, only if our opponent doesn’t draw into his or her early curve. In a pinch, we don’t mind under-dropping for a second 1-drop on turn 2, bumping our chances of hitting a character each turn a little higher.
Our odds of hitting our 3-drop and 4-drop are currently around 85% and 90% respectively, and those are the two points on the curve we should be most wary about compromising. We can survive not making a 1-drop; we can survive under-dropping on turn 2; but missing our 3- and 4-drop could give us significant problems. Our 5-drop hit rate is high, around 90%, but Marrow is the pivotal character for the deck, so we’re not about to skimp. We can accept a one in ten failure rate, but nothing higher for arguably our most important character. Would Curve Sentinels have run three copies of Bastion? A copy of Scaleface, however, will hit the bench, because even though she is better with the initiative than Callisto in some matchups, two copies of The Creeper for card-drawing still gives us a good chance of drawing her and a very solid chance of making one of our 6-drops. That takes us to thirty-four characters.
 Moving on to the resources, we start with the four-ofs that will stay four-ofs. We can’t cut a copy of Bloodhound, as it holds our curve together. Shrapnel Blast is our most powerful combat trick and one of the reasons for playing Morlocks in the first place, and Retribution is a close second both for early flexibility and raw power later in the game. Backs Against the Wall is our number one defensive trick, taking an opposing character completely out of the equation on our opponent’s key initiative turn.
A copy of Neutralized will be the first resource cut. It’s a useful card, but it isn’t an essential part of our game-plan like the key Morlock resources. It’s excellent against something like Fate Squadron, allowing us to “lock” a set of Fate Artifacts on a perpetually-stunned character. It’s great against X-Statix . . . on turn 6. It’s useful against Deep Green, but it probably won’t break that matchup unless our opponent gets careless with Ahmed. Cutting down to three copies gives us a good chance of drawing what is, in the end, a luxury. Team Spirit is a three-of, as we are unlikely to need one before turn 5. But we will be always able to find uses for extras, even if it’s simply to cause direct endurance loss via recovering Electric Eve and another character with The Alley and then evading Eve again, or to draw an extra card by recovering and evading The Creeper after all attacks are finished.
So, here’s our final list:
Characters
4 Tommy, Runaway
3 Electric Eve, Live Wire
3 Artie, Arthur Maddicks
4 Tar Baby, Adhesive Ally
2 Leech, Inhibitor
4 The Creeper, Jack Ryder
1 Caliban, Mutant Bloodhound
1 Ricochet, Johnny Gallo
3 Storm, Leader of the Morlocks
1 Hump, Servant of Masque
1 Will O’ The Wisp, Jackson Arvad
4 Marrow, Gene Nation
2 Scaleface, Dragon Lady
1 Callisto, Morlock Queen
Plot Twists
4 Bloodhound
4 Shrapnel Blast
4 Retribution
4 Backs Against the Wall
3 Team Spirit
3 Neutralized
Locations
4 The Alley
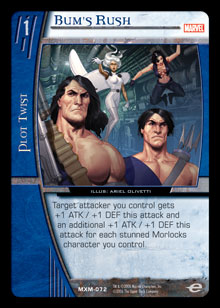 The single biggest piece of advice I can give you with this list is the same piece of advice that I recommend you take with any decklist you haven’t worked on yourself. If you want to play the deck in a tournament, build it as far in advance as you can and test. Maybe Neutralized doesn’t work out for you and you’d rather be more aggressive with Bum’s Rush. Maybe you want the extra card drawing of Birthing Chamber. It doesn’t necessarily need to be full-on methodical playtesting, but you need to get used to the deck, you need to get a feel for the mulligan conditions (a subject that could be the subject of an article series on its own), and you need to get used to the way you need to play the deck against the main contenders. Are you the aggressor? Are you hanging back, soaking damage, and biding your time for the perfect brickwall followed by a crushing attack back on-initiative? Are you just playing for the long game and winning with burn from The Alley, sniping in the early turns, and going for the odd stun later in the game?
Note that the list isn’t a million miles away from the starting point. This highlights an important truth of deckbuilding, particularly when deckbuilding an aggressive curve or short-curve deck—a deck can include almost all of the right cards, but still not quite gel. It could be a particular card, a missing piece of a puzzle (Teen Titans would still work without Press the Attack, for example, but it wouldn’t be the dominant force it is without it). It could be, as in this case, a curve that isn’t weighted quite right. But just because a deck isn’t performing as well as it should doesn’t mean it should be junked. Take a step back and think about what you’re trying to do and what you’re not doing that might help. Try taking the anti-hate cards out, trim the deck down to the core game plan, and see if you actually end up losing real matches to the hate or if, as in this case, the hate simply isn’t played as much as you feared.
I’m not going to give hugely detailed descriptions of matchups, partly because in this format more than most, a deck’s performance in a particular matchup can change radically based on the inclusion of single tech cards. Look at Deep Green vs. David Leader’s $10K Charlotte X-Statix deck. After the Pro Circuit, a lot of people, including $10K Charlotte winner Billy Postlethwait, took Asmodeus, Duke of Hell out of Deep Green after the complete no-show at Pro Circuit San Francisco by the decks it was there for (primarily G’Lock). This was, in context, a reasonable decision. However, one side effect that may have taken some people by surprise was that the deck’s matchup against X-Statix nosedived. If Deep Green recruits Asmodeus, X-Statix almost can’t win. If Deep Green doesn’t make Asmodeus, it’s probably getting smashed, particularly if the X-Statix player is running Terrax, Tyros. That one card flips the entire matchup on its head.
With that said, I can point out some general play approaches and some plays to look out for against some of the more popular decks.
Fate Squadron / Mexican Hardware Store
 You will need to play similarly against both of these decks, although unless Fate Squadron gets the nut draw with a full set of Fate Artifacts, it is Mexican Hardware Store that’s likely to end up putting the most pressure on your endurance total thanks to its burn suite. The good thing is that Melissa Gold ◊ Songbird, Sonic Carapace is terrible against you. You have a wide variety of plot twists that they really don’t want you to flip down repeatedly, the most obvious being Backs Against the Wall. Against both decks, you only want to make safe attacks if possible in the early game and use cross-curve attacks* where possible to avoid stunbacks. Don’t be afraid to burn a Retribution if it allows you execute a cross-curve attack that results in one of your attackers not stunning. When Marrow comes down, the focus switches to setting up a brickwall with Marrow on your opponent’s biggest attacker, making liberal use of Backs Against the Wall and Team Spirit to soak damage, blunt Other-Earth, and maintain attackers for your initiative. Against both decks, you want to recruit Storm on turn 4 to stop your opponent from bleeding your endurance total by forcing your low drops to evade.
Deep Green
Complicated, in a word. But then, I of all people would say that. In the early game, you may find yourself on the defensive, thanks primarily to Ahmed’s generous stats. Against Morlocks, Deep Green should be trying to push early damage through with Ahmed’s sheer size and Brother Eye, force evasions and deal breakthrough before searching for Fatality, and avoid stunbacks with Knight Armor and Knightmare Scenario. While you want to get The Alley going early, it may be best to not flip it until after you see the opponent’s turn 4 recruit; you want your opponent to think you don’t have it so that he or she will search out and recruit Fatality, whose text box will then be effectively blank for the rest of the game. Well, blank for you. She’ll still take out her frustration on your opponent’s characters. I already mentioned the plans for the later game—Callisto should be valued more highly in this matchup than Scaleface due to your inability to protect Scaleface from Spider-Man, The Amazing Spider-Man, and you want to get Ricochet down even if it means under-dropping later in the game. She also gives you the option of going for a late-game attrition war by repeatedly bouncing 1- and 2-cost characters to put +1 ATK / +1 DEF counters on your higher drops. Tar Baby will be worth his weight in gold in this matchup, gumming up Brother Eye and Slaughter Swamp.
Good Guys
Playing against Good Guys is broadly comparable to playing against the other aggressive decks mentioned above, but with a few key (and some unpleasant) differences. Part of it is +DEF ally triggers fed by Nth Metal and Magnificent Seven, which can prevent you building up board advantage early on. A big part of it is BWA HA HA HA HA!, as Morlocks pack a pair of particularly juicy targets in Shrapnel Blast and Retribution. While you can at least play aware of BWA HA HA HA HA!, there’s only a limited amount of playing around you can do. If at all possible, you should be aiming to hit Katar Hol ◊ Hawkman, Thanagarian Enforcer with Neutralized, taking some of the pressure off your higher drops on turns 5 and 6. However, getting the stun on Hawkman in the first place may prove tricky, as while equipped with an Nth Metal, he starts off at 9 ATK / 9 DEF, and you’ll have to be prepared for at least the first plot twist you try to stun him with being negated. Be prepared to make a conservative team attack, play Neutralized, and then take a hit on the backswing. Doing so puts far less pressure on you during your opponent’s initiative and puts you in better shape for your planned kill turn. One of the most important turns in this matchup is arguably turn 2; if your opponent has recruited Ted Kord ◊ Blue Beetle, Heir of the Scarab on turn 1, you want to make a real start on gaining control of the game by stunning both Ted and Booster Gold, Michael John Carter on turn 2. Unfortunately, this will often be difficult or impossible, although you can usually see on the board or reasonably anticipate most of what can happen.
*For anyone unfamiliar with the term “cross-curve attack,” you may have made use of one already. One of the most effective ways to gain board advantage is to execute a cross-curve attack, which means that, in a curve-on-curve matchup, one of your characters attacks up the curve and another one of your characters attacks down. When this happens, you usually trade an ATK pump (to enable the attack up) for board advantage (as your higher drop avoids stunning back when it attacks down the curve).
Feedback and Submissions
Before I sign off, I want to let you know how to submit deck ideas for future visits to the Clinic. If you have a deck that you think would make a good subject for examination, email it to me at vsdeckclinic@googlemail.com. Any other comments, suggestions, or ideas are also welcome. A few guidelines for submissions:
1) When you send the list, a brief accompanying description is appreciated. If there’s a card or interaction you absolutely don’t want to cut or that you think I might not catch from looking at the list, tell me. Perhaps most importantly, let me know what format the deck is for. If it’s not specified, I will probably take a look at the list and go for whichever format seems more appropriate.
2) I’ll only be able to write an article about a deck where I feel there’s room for improvement. If you send me a finely tuned death machine that takes the best decks in the metagame to pieces, I’m not going to write an article about how I failed completely to improve on it. Why not try writing about it yourself?
3) I will be choosing from the full pool of submissions each time I start a new article; don’t think that just because I haven’t featured your deck in the next article after your submission that I won’t feature it later. Also, while I would like to reply to every submission individually, whether or not I can do so depends to a large extent on the volume of submissions.
Thanks for reading, and tune in next week for one of those fun “interesting synergy” decks I mentioned in my introduction. Shenanigans guaranteed.