Part 1
In today’s article, I’ll review the characters of the Faces of Evil deck. The characters are the lifeblood of the deck. On one hand, their flexibility gives you the tools to fix most matchup problems. On the other hand, their redundancy gives you a consistent core plan of just attacking for the stun turn after turn. It is important you understand the role of each character in the deck before you decide to cut any one out. Additionally, the numbers of each character and each drop overall are crucial to the repeatable draw the deck can provide. If you think a certain quantity may be off, think back to the core goals of the deck in the first part of this series before making any changes.
Paul Ebersol ◊ Fixer
 Protection from Flame Trap, Search and Destroy, and Betrayal is priceless. Fortunately, the all-important text comes attached to a 2 ATK body for 1 resource point.
Along with Null Time Zone, Paul Ebersol ◊ Fixer is widely misunderstood. Thoughtless players see him as a permanent solution to the problem cards listed above, while overly cautious players point to his vulnerability to being stunned, thus turning all aforementioned plot twists back on, as damning. The reality is much closer to the middle.
Paul Ebersol provides protection for you on your initiative. For some, this might not be enough, but if you have been paying attention closely and you follow the rest of this series closer still, you will realize that this deck is only significantly active on its own initiative. Its few non-initiative sequences, like Shocker and Dallas Riordan, do not need the protection of Ebersol to function. Remember, you are not building a board position, you are just out to deal endurance loss.
If not already in play, Paul must be the first recruit or Hard Sound Construct target on a given initiative against a deck that could plausibly be playing any of the aforementioned cards. This is something you must plan for. Generally, the issue is Flame Trap, so depending on initiative, you have to have Paul at the ready for your next initiative before it becomes active.
Deciding how many copies to play is difficult. He is so important in some matchups that four seems warranted. However, uniqueness stings, and four copies will get you into trouble too often. (Uniqueness also rules out the otherwise excellent Paul Ebersol ◊ Techno, Gadgeteer, as there are too many situations where you must have the 1-drop in play.) I was an advocate of four copies for a long time, but in the end, three was the right number. Seeing as though if you hadn’t drawn him by turn 3 in some matchups, you were forced to find him anyway, Paul had to settle for less prominence than other more necessary and naturally-drawn cards, like Yellowjacket; Beetle, Armorsmith; and Melissa Gold ◊ Songbird, Sonic Carapace.
Beetle ◊ Mach 1
 The Mach 1 is a controversial card, no doubt, but one that performs several important functions for the deck. A 2 ATK body with flight and range for 1 resource point is optimal for the deck. More significantly, since the team-up is such a crucial part of the deck, particularly in multiples, a card that can find it for you cannot be valued highly enough.
Unfortunately, and obviously, the pivotal nature of Beetle, Armorsmith in this deck lessens the impact of a card that would otherwise be an automatic four-of inclusion. The place of Beetle ◊ Mach 1 depends on how important the team-up is to the deck compared to the risk of uniqueness problems. Uniqueness issues spell death for this deck, yet each team-up you procure for the deck vastly improves your chances of winning.
In the end, two copies seemed like the right number. This was not so much the result of any hard-core number-crunching, but more the measure of experience and a certain adjustment in play style. I felt as though I could afford to run more copies of Beetle ◊ Mach 1 because I tended to play Beetle, Armorsmith as late as possible (so I could find the right character and make the best discard). This gave me more room to play the earlier incarnation and cut the number of draws that could screw me. Essentially, I only needed to have another 2-drop besides the later version to be able to keep a hand.
In play, you want to make sure you get the biggest advantage you can from Beetle ◊ Mach 1. Because of Birthing Chamber, you want him to stick around until turn 3 at least. When attacking, you want him to pump into a bigger character, KO’ing to find a team-up, so that you can stun another character without losing any. Overall, he takes a bit of finesse, but the team-up is so important to the deck that you need to push a few boundaries.
Dallas Riordan, Mayoral Aide
 She’s a quirky character, but she has just the sort of ability you need in the deck. Being a Thunderbolts character for 1 definitely has its advantages, as you often need to team-up with little room to move in recruit. Importantly, Dallas lets you do this off-initiative while netting you a card.
Early on, using her to filter your deck is fine, as the damage is rarely worth the search for key cards like Beetle, Armorsmith or Null Time Zone. However, once you have a team-up or two out, she is probably best as a beater. Remember what you are trying to do with the deck.
Never, ever play her in the hidden area. The extra cards are always worth the risk, let alone the The Wrecking Crew potential. On off-initiatives, searching her out and netting another card can be extremely important, particularly if she is also fueling the latter effect of Birthing Chamber. In some matchups, you know you will be able to deal enough endurance loss no matter what, and you are just looking for key characters or Null Time Zone to ensure the win. You would be surprised how important a few Dallas activations are to such plans.
Joystick
 As with Dallas, being a 1-drop T-Bolts character has subtle benefits. However, that’s where the similarities end—Joystick is a totally dissimilar character with a different but nonetheless integral function in the deck.
Joystick is an excellent late-game (meaning turn 4 or 5—whenever your hand size is rapidly shrinking) target. Joystick will often give you the best return on your investment when you search or use Hard Sound Construct, generating the most ATK apart from Melissa Gold ◊ Songbird.
However, Joystick is surprisingly good at putting some DEF on the table, too. Flying Kick, No Man Escapes the Manhunters, and Mega-Blast can all be used to make attacks fail in the early game. The swing in tempo is often worth the card loss, so long as you aren’t sacrificing sure recruits or anything to do it.
Watch out for cards like Birthing Chamber and Dallas when Joystick is around, as +1 DEF is much better than you’d think it would be for this deck early on. Use them after Joystick fails to be combat-relevant or if you have no choice.
Nathan Garrett ◊ Black Knight
 Again, a 2 ATK / 1 DEF for 1 with range is great, but the ability is worth noting, as it is key to a few scenarios that your opponent often won’t see coming.
Lazy players using A Child Named Valeria/Catcher’s Mitt will leave characters in the front row, meaning Nathan Garrett can discard to allow you to deal breakthrough. As the character doesn’t stun, you can attack it over and over again for game-winning endurance loss.
Additionally, you can discard to fuel Hard Sound Construct or when you really need a way to pump Joystick. Nathan is a solid character without the ability, but remember that he isn’t vanilla, as your opponents rarely will.
Radioactive Man, Chen Lu
A strictly worse Nathan Garrett, Chen Lu provides some non-unique redundancy. Not having range makes for some awkward turn 2 formations with Songbird, but his 2 ATK and uniqueness considerations mean he makes the cut.
Ogre
Also mediocre, Ogre is a character included for uniqueness, period. His 2 DEF can be beneficial, but I’d take 2 ATK any day. Uniqueness is so important to this deck that he’ll do. It’s good to know how to play this guy, as you usually don’t want to waste time thinking about him. If you have Faces out, he’s attacking. The only exception is when you plan on attacking with Speed Demon twice that turn. Finally, the best part of this guy’s text is that he can sit in the back threatening to pump and then be Mega-Blasted without setting warning bells off.
Ratcatcher
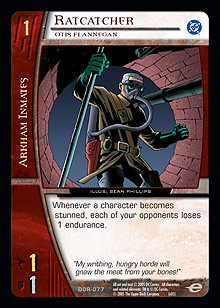 A long-time favorite card of mine, Ratcatcher took a while to grow on me as part of the Faces deck. In theory, the card seemed insane, yet initially, I thought Beetle, Armorsmith would be overworked and Ratcatcher was a pipe dream. Fortunately, that’s what testing is for, and when it was worked into the deck, it provided little disadvantage while making good draws great.
You don’t want to play Ratcatcher too aggressively. Essentially, Ratcatcher is for those times when your draw is so good that you can foresee your recruits until the end of the game and can thus afford to be more liberal with the Armorsmith. A typical scenario would be to search for Ratcatcher on your third turn initiative with Beetle when you have Yellowjacket ready for the next turn. This allows you to stun and KO Beetle that turn, or perhaps have a Hard Sound Construct ready for Beetle later on.
If left untended, Ratcatcher can be good for 6–8 endurance loss, which is quite a swing. Your opponent will not like this and will find ways of attacking him, tempted by the opportunity to deal breakthrough. The savvy among you might have realized that this is a win-win scenario: you deal a lot of endurance loss, or you keep your better characters. At the end of the day, Ratcatcher can ice a game for you that you think you probably should win, but you just need that little bit extra.
Yellowjacket
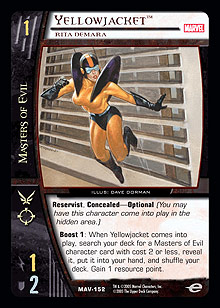 Here is the pulse of the deck. Where Beetle, Armorsmith provides the finesse, Yellowjacket does the hard yards. Best used as a search for Beetle, Yellowjacket allows you to string several turns of desirable recruits together. I like to use Beetle and Yellowjacket to search for each other over several turns. I allow them to be stunned, KO them, and keep the process going.
Yellowjacket gives you the redundancy the deck needs, bringing into reality the idea of a deck that Beetle inspires. However, Yellowjacket does a lot on her own, too. She gives you an extra card, which lets you create all sorts of off-curve shenanigans for little cost. Her one-two punch allows you to bring things like Birthing Chamber and The Wrecking Crew on-line consistently.
Although playing her in the hidden area is generally a bad idea (because of The Wrecking Crew), her reservist status can be amazing, allowing you to play an extra Birthing Chamber or Faces of Evil into your row when you draw or obtain more than one in a given turn. On top of this, in later turns, Beetle, Armorsmith can search her out to get an extra character when you are looking to get someone else but have resource points left over. All in all, Yellowjacket is one of the stars of the deck.
Beetle, Armorsmith
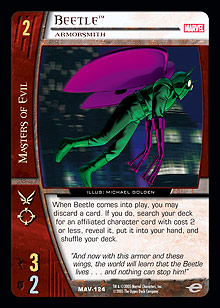 This is the most important card in the deck. Where Yellowjacket makes it look like hard work, Beetle just glides on in and does the job effortlessly. His 3 ATK for 2 is above average. Flight and range are great. The ability is just nuts—being able to get any affiliated 2-drop is amazing. This ability is the backbone of the deck, allowing you to organize the most efficiently appropriate recruits throughout the game, as well as hammering home your redundancy.
Importantly, you need to know how to get the most out of the Armorsmith. When Beetle becomes stunned, it is nearly always appropriate to KO him. You want him in the bin as a target for Hard Sound Construct. You also want him in the bin so you can recruit him again, as a target of Yellowjacket or a natural draw. I like to wait for as long as possible before I play Beetle, not only to get the discard right, but also to ensure that I can play Beetle ◊ Mach 1 if I draw him and to allow myself the last possible chance to fill out my curve.
Beetle is an amazing card, but he must be used conservatively to make sure that his flexibility is maximized.
Melissa Gold ◊ Songbird, Sonic Carapace
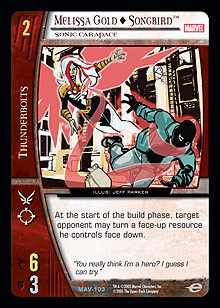 This character is crucial to the scheme of the deck. When playing an off-curve combat deck, tempo is all-important. The most obvious way of generating tempo is through efficient use of resource points. For a mere 2 resource points, you have a character that can go toe-to-toe with several Golden Age 4-drops, before pumps. When Songbird is able to do for 2 resource points what your opponent is doing for 3 or 4, you are effectively gaining resource points. When you can use those resource points effectively, by attacking smaller characters or attacking directly, you are generating tempo.
For the above reasons, Songbird must be included as a four-of. You want to play her as soon as possible, unless your opponent plays a first-turn Alfred Pennyworth or some other sort of control card that will make you pay for her ability. As there are other copies of her in the deck, you want to send her in, get her stunned, and KO her, allowing you to play her again later and depriving your opponent of her text for the next turn. Songbird should dominate the early game and then mount successful kamikaze attacks in the later game. Any matchup that requires a lot of combat needs her, but you have to use her properly to avoid her disadvantages.
Melter
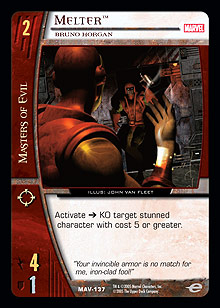 Forget the text—Melter is important for several reasons. First, unique characters are great. Second, Melter acts as something of a second-rate Songbird. Sometimes you don’t have a team-up, and Yellowjacket has to recruit Melter. Sometimes you have what you need, and you just want to play the largest-ATK character you can find. His 4 ATK gives you something of a safety net when attacking Sentinel Mark II or Tim Drake, who both have a habit of powering-up. Really, this guy is just an efficient beater, and fortunately this deck loves that sort of mentality.
Shocker
Probably not as good as everyone thinks, but randomly devastating nonetheless, Shocker plugs an important hole in the deck and is a big payoff for your investment in the Beetle/Yellowjacket plan against several decks.
Faces is a fast deck. In fact, Faces is a surprisingly fast deck. However, it isn’t the fastest deck, or more correctly, it isn’t the fastest draw. Against decks like Squadron and TNB, Shocker can take the sting out of a deck that is potentially faster but less consistent than yours. It can also take out the key characters of combo-ish or control decks like New School.
Remember, though, that if Shocker was a 1 ATK / 2 DEF, he wouldn’t be playable. Esoteric answers need to be incidental. A 3 ATK / 2 DEF for 2 is a good enough deal as a beater that the secondary effect is palatable for the couple of games it will win you. I don’t want to downplay Shocker too much, but the ability should only really be used as a way of gaining tempo on non-initiative turns, stemming the tide of a brutal beatdown or buying time for a heavy hitter to move in. Don’t go crazy with Shocker—you very rarely want to be the control player in the fashion he dictates.
Blizzard (and Erik Josten)
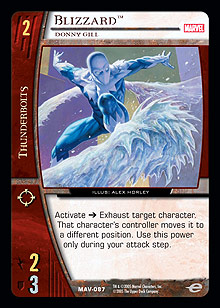 In many ways, Blizzard is the 60th card of the deck. Being the extra 2-drop was a responsibility that had to fall to someone, and Blizzard got the nod. In the end, his 3 DEF did the trick, with Erik being great when your opponent drew badly, but terrible otherwise. Cards like Birthing Chamber and The Wrecking Crew mean that preserving as many characters as possible is better on the first couple of turns than the threat of an ever-growing 2-drop that cost you a character on turn 2. This may seem to go against what the deck is about, but I didn’t say losing characters for no reason was a good idea, just that losing them to stun others at whatever cost should be the deck’s modus operandi. Blizzard fills the 2-spot, is unique, is a Thunderbolt, and conveniently doesn’t get stunned by Hounds of Ahab one on one.
Melissa Gold ◊ Screaming Mimi
When people started building their Faces decks, Screaming Mimi was given a lot more press than she deserved. Surprisingly, I hate drawing this card. Her ping ability is not that great (when compared to something like Scarlet Witch) even if it seems like it is really good. Considering that she spells big trouble for a cornerstone of the deck (Songbird), why is she in the deck if she is so mediocre?
In the end, her ability is just good enough to get her in. A few matchups and a few scenarios can only be won with her text. Fortunately, in the matchups where Songbird is bad (Alfred decks), Screaming Mimi is amazing. Her ability will not win you a game on its own, but it can often deal the 6 or 7 endurance loss you need to finish your opponent off. Don’t go overboard trying to win a game with her, because you always think she is doing more damage than she is. This is often because on many non-initiatives, you deal no endurance loss during combat at all. Just think of her as a one-off finisher and plan appropriately. Ratcatcher can be her best friend.
Kyle Rayner, Last Green Lantern
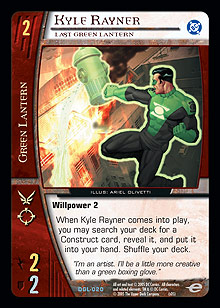 For the uninitiated, Kyle is able to search out Hard Sound Construct (which is a Construct, if you still haven’t worked it out yet!). As such, Kyle is a big part of the Instant Offense capabilities of this deck. Generally mediocre otherwise, the non-Faces affiliation of Kyle is made easier to bear by the fact that he still gets the bonuses from The Wrecking Crew and Faces of Evil. Typically, you want to save Kyle Rayner for the kill turn, as his inability to team attack or reinforce will mean that he is never that beneficial early on. Kyle has a very specific role in the deck and doesn’t disgrace himself otherwise, but don’t get too loose with him. It is the power of Hard Sound Construct that drives him.
Foxfire
Generally, between the pressure of your offense and Null Time Zone, you have quite a good game against non-combat strategies such as New School and the various A Child Named Valeria decks. However, Foxfire can really put these matchups over the top for you. Such matchups are usually a race between your endurance loss–dealing capabilities and your opponent’s ability to set up. Most players assume you are just going to attack and leave them be to go about their business otherwise. Foxfire gives you a wrench to throw in the works. An unthinking player will be devastated, and even a good player will have problems. Non-combat decks are very difficult to pilot, particularly when confronted with untested scenarios.
Still, you don’t want too many non-Faces characters in the deck. Although team attacking and reinforcement are generally for the losing and the paranoid, they are sometimes necessary to cement an advantage or build a winning board for the kill turn. In the end, I think Foxfire is worth the slot, but I would definitely draw the line at three non-Faces guys (Kyle Rayner, Ratcatcher, Foxfire). Some might think your expected recruit of her, on turn 4 after using Beetle, would be too late, but testing showed that the shock value was enough to justify her late arrival. Fortunately, you’re looking to pitch something to Beetle in every game, and for the most part, Foxfire will be ready for jettison. However, in certain matchups, she can make the difference.
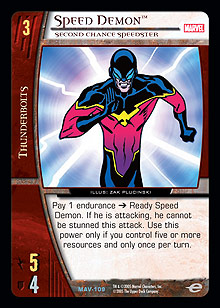
Speed Demon, Second Chance Speedster (Heinrich Zemo and Mystic Summons)
 In Limited, Heinrich Zemo ◊ Baron Zemo, Leader of Zeulniz is an absolute powerhouse. We originally thought he could be a Constructed powerhouse as well. He seems to enhance the major theme of attacking up the curve one-on-one, even if he does cost 4 resource points. Sometimes this was even a benefit, as it allowed you to build an offense around him without losing too much to Flame Trap or Total Anarchy. My eventual decision to cut Heinrich had nothing to do with him being bad—it was the amount of space the deck required for him to be good that just wasn’t worth it.
If you want to play larger characters, you need to keep a couple of things in mind. First, any cards you devote to such a plan will bog down your early draws. You not only need to hit a 1 and a 2, then another 1 and 2 on turn 3, but you need to draw the pumps to support those characters being able to stun up the curve. Second, even if you think this is a worthwhile sacrifice to make, you need to make sure you are devoting enough cards to such a plan that when you need the plan to come online, it will.
This was the big problem. Heinrich was a narrow answer that didn’t really provide enough bang for his buck, even when he only took up three slots in the deck. In the end, I decided later drops were only necessary if they could flat-out win you the game almost by themselves. Heinrich was a bit of a win-more card, marginally improving situations that were often already positive. In the end, it was the originally out-of-favor Speed Demon that got the nod for the deck.
Speed Demon is only slightly more expensive than the other characters, being able to be played on turn 3 in a pinch (which could even preserve characters in a squeeze) and also get the bonuses from Faces of Evil. More importantly, he sometimes won games all by himself.
Over time, we found that, while nearly unbeatable on odds, the deck could get a perfect draw and still struggle to put away an opponent on evens. It just didn’t have the punch. We tried a lot of different answers, mostly the characters mentioned above (particularly Heinrich), but also more pumps and other plans, but none of them worked. I had not really liked Speed Demon due to his vulnerability to Wonder Man and Terra, but after testing him a lot more, I began to see that he was extremely powerful.
Due to the turn-stamping effects of Mega-Blast and Flying Kick, a fifth- or sixth-turn Speed Demon could easily become ridiculous. Game-winningly ridiculous. Our sixth turn problems tended to be because our opponents had access to around 12 more points of DEF in the form of another character. As attacking one-one one was the strategy par excellence, it surprises me that it took so long to settle on Speed Demon. Speed Demon was often able to take out two characters while opening up breakthrough possibilities and allowing for optimal attacks with other characters like Ratcatcher.
In the end, three Speed Demons seemed like the right number. Drawing one on turn 5 was a bonus, but you had to make sure he was in the grip by turn 6. Looking back, he really does seem like the final piece in the puzzle, and I feel vindicated in the long hours I spent puzzling out the role of the larger drops in the deck, as my last minute decision to push hard for Speed Demon was definitely the right one.
There ends part two! If you still can’t get enough Faces, stay tuned for part three, which will cover the non-character cards in the deck.