
Introduction and History
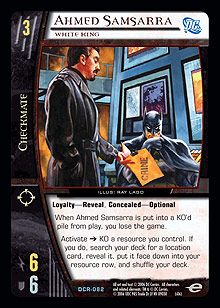 As soon as Ahmed Samsarra was previewed, I knew he’d be one of the most played cards at Pro Circuit San Francisco. An effect that allows you to search your deck multiple times throughout the course of the game at the cost of a simple activation is pretty ridiculous and easily exploited. The White King not only adds consistency to your deck by searching out vital locations, but it also lets you play single copies of locations that help win specific matchups. But as I’m sure you’re all aware, with great power comes great responsibility. The power that Ahmed grants you is that of a location toolbox, and the responsibility you have is to prevent him from being KO’d and losing you the game. So, what’s the best way to ensure that Ahmed doesn’t get KO’d? I’ll address that in a moment.
The concept of brick-walling attacks is strongly supported in the Checkmate affiliation through cards like Checkmate Safe House, Knightmare Scenario, and Knight Armor. Brick-walling an attack essentially gives you an extra turn where you have the initiative, and we all know how good stealing the initiative is. While playing against rush decks, which are popular in every format, brick-walling a single attack will wreck your opponent’s attack step and allow you to win the game through what are basically three straight turns of initiative. Checkmate Safe House is an insane card when multiple copies are in play, and it’s not too uncommon to give +3 or +4 DEF to all your support row characters. In addition to giving you extra DEF, Checkmate Safe House is a Team-Up card, opening up dozens of possibilities concerning other teams that could find their way into the deck.
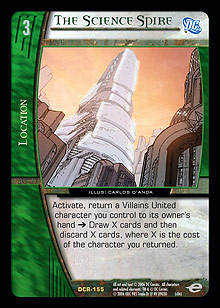
Back to what I said in the first paragraph—how do you stop Ahmed from being KO’d? The best way to ensure that Ahmed doesn’t lose you the game is through effects that prevent him from ever hitting the KO’d pile in the first place. Threat Neutralized is the best example of a card that bypasses Ahmed’s alternate loss condition, but it’s unfortunately not a location and is therefore unsearchable via Ahmed. However, The Science Spire would be perfect for bouncing Ahmed back to your hand to prevent him from being KO’d, and additionally, it allows you to draw a few extra cards. So, to answer the question, the best way to ensure that Ahmed doesn’t get KO’d is by teaming-up Checkmate and Villains United to give you access to The Science Spire. You get to use Ahmed’s amazing effect as much as you want, and you don’t have to worry about him being KO’d and losing you games.
The Build
Although TAWC only placed one team member into the Top 8 at Pro Circuit San Francisco, (unless you count Jason Hager wearing a TAWC shirt), most of them did really well on Day 1 with their Checkmate / Villains United build. For reference, here is the list that made Top 8:
Tim Batow
Top 8, Pro Circuit San Francisco
60 Total Cards
Characters
4 Connie Webb, Knight
2 Mikado and Mosha, Angels of Destruction
1 Sarge Steel, Knight
4 Dr. Psycho, Mental Giant
4 Ahmed Samsarra, White King
1 Kang, Kang Cobra
4 Bizarro, ME AM BIZARRO #1
1 Mr. Freeze, Brutal Blizzard
2 Maxwell Lord, Black King
1 Ultron ◊ Crimson Cowl, Dark Disguise
4 Genis-Vell ◊ Photon, Transformed
1 Deathstroke the Terminator, Ultimate Assassin
Plot Twists
4 Enemy of My Enemy
4 Knightmare Scenario
4 Threat Neutralized
Locations
1 Bizarro World
2 Brother Eye
4 Brother I Satellite
4 Checkmate Safe House
1 Latverian Embassy
1 Phantom Zone
1 Slaughter Swamp
1 The Science Spire
Equipment
4 Knight Armor
As I said before, this deck is focused on brick-walling attacks. Checkmate Safe House is an important piece the deck, providing a solid defensive boost across your entire board. Threat Neutralized is included for extra Ahmed protection, and the +1 ATK / +1 DEF bonus it provides is more useful than you would think. Eight character searchers pretty much guarantee that you’ll never miss your curve, and if you count Connie Webb, you have twelve different ways to search for Ahmed. The location toolbox contains something useful for just about every matchup you’ll come across, and it can be expanded depending on your local metagame.
The Strategy
Checkmate / Villains United wants the even initiatives, not so much for its own sake but to inhibit the plans of other decks that like evens. Honestly, you can play on either initiative, but I’ve found it easier to attack on turn 4, stop an attack on turn 5, and then attack again on turn 6. Considering that Ahmed is what makes this deck function, he is your mulligan condition. On turn 2, if you already have Ahmed (or a way to get him) and an extra Brother I Satellite, don’t hesitate to use it to grab a 2-drop. Once Ahmed is in play, he can search out another copy of Brother I Satellite if necessary, so you don’t need to save your search cards for your higher drops.
 Where to recruit Ahmed is the subject of much debate. Really, the decision between playing him hidden or visible depends on the matchup you’re facing. His 6 ATK / 6 DEF stats are useful in stemming the bleeding during the early turns against rush decks, and discarding a Genis-Vell ◊ Photon to boost his DEF will stop cards like Lady Lark, Linda Lewis dead in their tracks. However, against decks that play Fatality, Flawless Victory or other KO effects, you should play Ahmed in the hidden area to prevent him from being KO’d before you can team-up and get a copy of The Science Spire into play. Personally, I like playing him hidden just so I can keep him on the board every turn, but against rush decks, I won’t hesitate to play him visible to save endurance. Just play the deck for a while, and eventually you’ll start to know where Ahmed should go depending on what cards you’ve seen in the first three turns of the game.
Bizarro, ME AM BIZARRO #1 is the only 4-drop in the deck, so there shouldn’t be any debate on who you should recruit on turn 4. As for 5-drops, you have three different options: Maxwell Lord, Black King; Mr. Freeze, Brutal Blizzard; or Ultron ◊ Crimson Cowl. Ultron’s purpose in the deck is to combat Faces of Evil and off-curve decks, but since that archetype isn’t too popular in Silver Age, he’s rarely a character you really want to recruit.
Maxwell is your optimal 5-drop, if not for his 10 ATK / 10 DEF frame, then for his ability to shut down payment powers and team attacking. There are some situations where you won’t want to have two Kings on the board for fear of getting them both stunned, so you’ll have to recruit Mr. Freeze instead. He’s really good against rush decks that want to end the game on turn 5, because your opponent will certainly think twice before attacking him. It’s good if he doesn’t get stunned, because it means you’ll be recovering a different character, but it’s also good if he does get stunned, because it means your opponent’s 5-drop won’t be readying next turn. It’s a win-win situation, and he also has range, which allows him to benefit from Checkmate Safe House and still be able to attack.
For turn 6, you have Genis-Vell ◊ Photon, an essentially vanilla 14 ATK / 12 DEF reservist with flight and range. It’s certainly nothing to complain about, but it’s nothing special, either. Genis-Vell was included primarily as a DEF boost for Ahmed, but he functions perfectly well as a 6-drop. His lack of the Checkmate affiliation can be annoying, so you’ll have to save an Enemy of My Enemy to search for him. If the game isn’t over by turn 7, Deathstroke the Terminator, Ultimate Assassin can sweep up by KO’ing the biggest character your opponent controls. Checkmate / Villains United only plays twelve plot twists, so it’s easy to refrain from using any to get Deathstroke’s powerful vengeance effect to work. Even if you don’t get to KO a character, his massive 17 ATK should be enough to push through for the final points of endurance loss to win you the game.
Knight Armor should always be equipped to Bizarro if you have one on turn 4. Any extra ones should always go on your 5-drop or Ahmed Samsarra if you recruited him in the visible area. Your 2-drop won’t be on the board long enough to waste a Knight Armor on, and it’s unlikely that you’ll draw into enough copies to equip your 6-drop as well. Bizarro’s vengeance will rarely trigger if he has 11 DEF while attacking, and the extra DEF boost will go a long way when trying to brick-wall attacks against rush decks.
It’s important to understand which locations you should search for each turn with Ahmed. You should try to use the White King’s effect every turn that he’s in play, KO’ing dead resources (used plot twists, flipped copies of Brother I Satellite, or character cards) to search for useful locations. Checkmate Safe House is your default search target, meaning that if you don’t need a specific card, you should grab one. Brother Eye is the second most important location, and as your main source of offensive power, it’s helpful if you can get it into your row by turn 4.You should search out a copy of The Science Spire if you ever think one of your Kings is in danger of being KO’d. Slaughter Swamp is nice to have simply as a utility effect, allowing you to discard high-cost characters liberally with the guarantee that you can get them back when necessary. Bizarro’s second affiliation conveniently allows you to flip Bizarro World against G’Lock and flip Phantom Zone against decks that get tricky with the KO’d pile. It should be noted that Bizarro World can also be flipped to stop your opponent from gaining life from Bizarro’s vengeance effect, a handy little trick that’s sure to irritate your opponents. Latverian Embassy is useful against combo decks that foolishly flip important plot twists from the resource row, but the card was actually included in the deck for the Ivy League matchup. It’s no longer necessary and can probably be dropped for other locations that increase your win ratio against problematic decks. Use Ahmed’s effect wisely, because every activation counts.
Matchups
Mexican Hardware Store:
This matchup depends entirely on turn 5. If you don’t have the cards to brick-wall an attack, Mexican Hardware Store can easily push through for enough damage to steal the win. However, if you can get a few copies of Checkmate Safe House into your resource row by turn 5, you can make a huge stand that will turn the tide of the game and allow you to win on turn 6. Defensive cards are important against Mexican Hardware Store, so save all of your copies of Knightmare Scenario and hope that you draw into a Knight Armor or two. If John Henry Irons ◊ Steel, Steel-Drivin’ Man comes into play and targets an equipment card in the KO’d pile, you can use Phantom Zone to remove it to negate the effect. As long as you can brick-wall an important attack on turn 5, you can swing back for enough damage to make up for however much you lost during the first few turns. Just make sure you don’t lose too much endurance in the first four turns.
Deep Green:
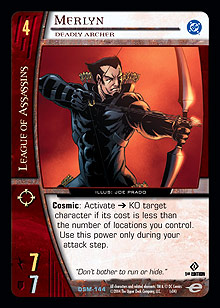 presents a significant threat for Ahmed Samsarra. The first thing you should do on turn 3 is search for a copy of The Science Spire, because if you don’t, you’ll be disappointed when Merlyn shoots your Ahmed on turn 4 and you lose the game. Once Rook Control ships Merlyn to the hidden area, it’ll be tough to get his cosmic counter off. I think it’s necessary for Checkmate / Villains United to play a copy of Sewer System to prevent all of your characters from being shot down. Maxwell Lord is great for stopping Brother Eye pumps before an attack is declared legal, and also for negating the effect of Checkmate Safe House on a single character. You’re under more pressure to end the game than the Deep Green player is, because if Deep Green gets Spider-Man, The Amazing Spider-Man into play, then the Deep Green player can delay the game for as long as he or she wants and continue to snipe all of your characters. You have to play aggressively, getting in as much damage as possible before turn 7. If the Deep Green player misses Merlyn or you can get his counter off, this matchup becomes much more favorable, but if the archer is allowed to use his effect every turn, you’re inevitably going to lose.
X-Mental:
The combo of Fatality, Flawless Victory and Sunfire pretty much guarantees that you’ll lose Ahmed on turn 5. You have to make sure that you can Science Spire him out of harm’s way by then and that you are able to make due with the locations that you draw for the rest of the game. Don’t flip The Science Spire until absolutely necessary, because a well-timed War of Attrition will ruin your plan and you’ll be forced to rely on drawing into a Threat Neutralized. If you can survive past Ahmed’s departure, the rest of the matchup is fairly straightforward. Watch out for Alley-Oop! and Shrink, and try to end the game on turn 7 with Deathstroke before Rachel Summers ◊ Phoenix comes into play.
Good Guys:
Kang, Kang Cobra has one purpose in your deck: to help you win this specific matchup. The only problem is that he’s a 3-drop, and turn 3 is when you absolutely have to play Ahmed. I’ve found that the most convenient time to play Kang is turn 5 because you can recruit him and a 2-drop to make the most of your resource points. The Good Guys player is probably going to play No Man Escapes the Manhunters on your Kang as soon as he or she gets the chance, so make sure you’re prepared. However, all you need is one initiative with Kang on the board, because you can attack across the curve and know that your opponent doesn’t have any tricks up his or her sleeves. If you can eliminate Good Guys’ board on turn 5 or 6, there will be no coming back from that even if the opponent does get Kang off the board. Just continue to curve out after you stun all of the opposing characters, and you’ll naturally win by having bigger characters.
Fate Squad:
Fate Squad aims to win the game on turn 5, so your goal in this matchup is to win the game on turn 6. Depending on how quickly the Fate Squad player can get all three Fate Artifacts out, you should be able to keep Ahmed, Bizarro, and your 5-drop going into turn 6. Hitting a 2-drop takes a lot of pressure off you to gain control of the game, and while you can still win without getting one, you’ll take much more damage during the early game. This matchup is one of the few where you want to play Ahmed visible so that he can soak up damage, because Fate Squad doesn’t pack KO effects. Optimally, you want your 5-drop to be Maxwell Lord so he can stop a Panacea Potion mid-combat, but if you don’t have a Science Spire to save Ahmed if he gets stunned, Mr. Freeze is a safer play. Save all your copies of Knightmare Scenario for turn 5 so you can stop an attack, and then make sure you have a Slaughter Swamp in your resource row going into turn 6. Bouncing a useless card back to the Fate Squad player’s hand will make Albert Gaines ◊ Nuke the size of an average 5-drop and allow you to push through for enough damage to end the game.
The mirror:
The best way to get ahead in the mirror is take advantage of the fact that your opponent is also deeply concerned about protecting Ahmed. This matchup is another reason why Sewer System should go in the deck: to allow you to attack Ahmed Samsarra if he’s hidden. If you can force your opponent to use The Science Spire on Ahmed early, you can cut off the opposing supply of locations, effectively limiting your opponent’s defensive options. Drawing into more copies of Knight Armor than your opponent does is also helpful. Your style of play should be determined by what initiative you get; if you get odds, try to stall the game out to turn 7 so you can play Deathstroke on your initiative, but if you get evens, try ending it on turn 6. Make sure you don’t get brick-walled, and only make attacks you know will succeed.
Conclusions
First, let’s examine immediate changes to the deck. Latverian Embassy can be cut to put in a Sewer System for the Deep Green matchup, and Ultron can be replaced by a more useful alternate 5-drop. I’ve never really been a fan of Connie Webb, mainly because I hate drawing into her after I use her effect, so I would cut her and max out the Sarge Steel count. With the rise of No Man Escapes the Manhunters in aggressive decks, I think Huntress, Reluctant Queen would be a better 6-drop than Genis-Vell ◊ Photon. With Huntress, you can protect your Ahmed from being moved to the visible area and negate the -3 DEF part of the effect if your opponent targets a visible character you control. In addition, she’s a Checkmate character, so you finally have a searchable character at the 6-drop slot. A 4-drop with the Checkmate affiliation could also go into the deck to provide a backup plan if you don’t draw into Bizarro or are unable to team-up with Villains United before turn 4.
The Checkmate team’s ability to stop attacks and take control of the game on turn 5 is too strong to be ignored in Silver Age. Many people are writing off Checkmate / Villains United as weak compared to Deep Green, but Deep Green’s strategy is injured significantly if Merlyn loses his cosmic counter. Lots of decks will be playing hidden hate after seeing the results of the Pro Circuit and $10K Hamilton, so copies of Merlyn everywhere are going to be in more danger then they were before. Checkmate / Villains United is a much sturdier deck with fewer Achilles heels, and it still gets to exploit Ahmed Samsarra’s amazing location search ability. If you like powerful control decks that can be aggressive when they need to be, Checkmate / Villains United is a great choice for the current PCQ season.
If you have any questions, comments, suggestions, complaints, or just want to say hi, send me an email at gvl@nc.rr.com. I’ll respond as fast as I can.