Part 1
Part 2
In this article, I will cover the non-character card selections for the deck. Each card was assessed very carefully, both in terms of what its purpose was in the deck and how many copies were needed for it to be effective. Remember, this deck is not so much about particular plot twists as it is about particular characters—the plot twists are there to support the characters, not the other way around. Each non-character card has a role that is meant to bolster the redundancy of the deck, not create deviations from its core game plan. If you want to make changes to your own deck, I would warn you that I consider the non-character cards to be much less interchangeable than the character cards examined in the preceding article.
Faces of Evil
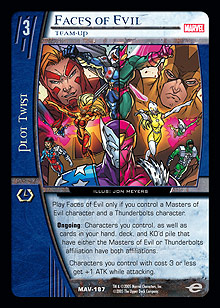 Superficially, Faces of Evil seems like mediocre card. Its threshold is as high as could be considered acceptable. Comparisons to The New Brotherhood and Honor Among Thieves seem to find it wanting. Those criticisms, though, ignore the role of the team-up in the deck and how the deck is attempting to win.
Where this deck is more successful than other off-curve combat strategies is in its ability to consistently put several 1- and 2-cost characters on the board. Without a beneficial team-up, the problems of uniqueness could be solved by mashing together any two teams with a sufficient variety of characters. When we cottoned on to the power of Beetle, Armorsmith and Yellowjacket, we tried several different team-ups, namely MoE/Syndicate and MoE/Squadron. However, none of them seemed to work as well as Faces, and over time, we realized that the importance of the team-up could not be overstated.
The benefit of the team-up is quite restrictive, but when you routinely have four characters on turn 3, +4 ATK is nothing to sneeze at. Obviously things get crazy when you have multiples out. The fact that Faces can be searched out by a character of one of the affiliations it affects is also very important (see more under Beetle ◊ Mach 1 in part two).
Additional Team-Ups
 Stormfront and Millennium were the next best team-ups to be considered, but over time, it seemed the benefits of teaming up without the ATK bonus dwindled to almost nothing. On the whole, you should rarely be planning to reinforce with this deck. Sometimes it will be necessary, but for the most part, you want to be set up to attack back where possible. Between Hard Sound Construct and Beetle/Yellowjacket, you are well set-up to engage in a short-term massacre of both players’ boards, so long as it leads into your kill turn. In fact, this is your primary plan against some decks (like Teen Titans) and should be your default plan most of the time.
Additionally, team attacking is not recommended. Team attacking is only advisable when you have so few plot twists that you have to team attack now or risk not having enough gas to have a realistic shot at winning on your kill turn. Those are dire times indeed, and you will need to judge such situations for yourself.
On the whole, however, this deck is not for the meek or paranoid. When under attack, you need to be confident that your opponent cannot deal more endurance loss than you. Reinforcing when you could be swinging back goes against the nature of the deck, with cards like Hard Sound Construct and Beetle/Yellowjacket there to rebuild your offense not plug your defence. Likewise, only team attack as a last resort. If your opponent is playing cards like Acrobatic Dodge, you’re up against it anyway. You aren’t playing for board advantage, you are playing to deal 50 as quickly as possible.
To that end, extra team-ups take the edge off the deck and encourage mediocre plans, even when they’re (apparently) free, as with Stormfront.
Birthing Chamber
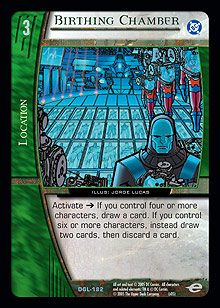 After Faces of Evil, Birthing Chamber is the next automatic non-character inclusion and is most definitely a four-of. Birthing Chamber complements this strategy so completely that it often seems like a win-more card. In truth, Birthing Chamber stabilizes your average draws, allowing you to keep your foot on the gas.
Birthing Chamber functions best when the deck it assists is as redundant as possible. As this deck moved more and more toward a list that consisted almost entirely of characters and pumps, Birthing Chamber got better and better. Be careful to get the maximum from each activation—work out your recruits before turning sideways, as two cards are always better than one, even if you have to discard.
The extra cards supplied by Birthing Chamber ensure optimal recruits and sufficient pumps turn after turn. Because of this, if you have an inactive Birthing Chamber that requires a little caution to bring online, you should nearly always err on the side of safety. As Birthing Chamber will nearly always provide a relevant card, the slight loss in tempo will often be worth it. At the end of the day, you are still playing an aggressive deck. Just remember that the pistons need to be greased to keep the engine running.
Hard Sound Construct
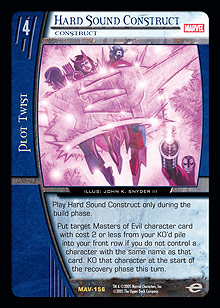
As a card that not only breaks the rules of Vs. in an obvious way, but is reminiscent of the most dominant character of the last PC before LA (Dr. Light, Master of Holograms), I am surprised that Hard Sound Construct hasn’t seen more press.
Hard Sound Construct is a vital part of this deck, effectively allowing you to rebuild your board after the most devastating turns. Typically, its target is Beetle, Armorsmith, who can set off any number of recruits, though it can also get Paul Ebersol ◊ Fixer when you have to have him. Additionally, it lets you play loosely with matchup specific characters, like Shocker and Screaming Mimi, early in the game.
Hard Sound Construct can be an awkward card, and you don’t want as many as you can get your hands on. Two is often more than enough, even post–Flame Trap! You need to plan ahead for Hard Sound Construct, so make sure you understand the card completely, as you can only target MoE characters that don’t share a name with a character already in play. This can be more difficult than it looks if not handled with care. A lot of the time you will need to KO your non-unique characters to give yourself the best chance of filling out your recruits in later turns. This make your KO’d pile a lot less abusable than you would think. I consider this card a Beetle-enabler first and foremost, and I plan that way, unless I can get away with it just being a bonus.
If you have to go to another turn, remember that Hard Sound Construct KO’s the revived character at recovery, so make sure it gets stunned to keep your board as full as possible, as you will often recruit Screaming Mimi after such a play.
Null Time Zone
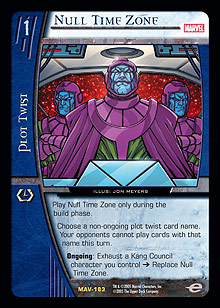 After all of the hype, the most talked-about card in pre-JLA Golden Age sort of fizzled at PC: LA for most people. Generally, the best use of the card is misunderstood.
Null Time Zone will rarely dominate a matchup by itself. It needs to be combined with some form of pressure so that the temporal advantage it provides can be converted into a concrete gain that can be carried over to the next turn (or be used to finish the game then and there). In essence, Null Time Zone should complement and support your main plan, not be a vague, one-off answer to problems you otherwise cannot deal with.
Null Time Zone complements Faces beautifully, because Faces puts decks on a clock that is rarely matched. Without NTZ, there are several powerful cards in Golden Age—Reign of Terror, Team Tactics, and A Child Named Valeria, to name a few—that can turn the game against you in one fell swoop. In several matchups, you can force your opponent into a position in which he or she has only one out against you. Obviously, this is where NTZ shines.
Four copies tended to be too much, as NTZ is a support card and not a primary weapon. Sometimes otherwise good draws can be ruined by drawing too many of this card. Still, in some matchups, getting an NTZ is critical. If you have secured your primary recruits, getting Dallas out and aggressively using Birthing Chamber to find NTZ is advised.
Overall, you should believe the hype. NTZ is as good a card as the punters have claimed, so long as it is used correctly. Do not be afraid to pitch it to Beetle when you know the matchup doesn’t need it (like Avengers), but make sure you know how to use it when it is required. Some matchups boil down to how well you play NTZ (Common Enemy comes to mind).
The Pumps
The combat modifiers are so important to the deck that they deserve an introduction of their own. By no means has an exact and unalterable list of pumps been given for this deck. I am happy with the distribution of pumps in the list I gave. However, this could be subject to change. What is important to remember are the core goals of the deck outlined in part one of this series. In the end, I chose pumps that complemented my overall strategy, instead of going for raw power. Raw power is important, but it can’t just be forced into the deck. I will go through the pumps I consider relevant below.
Mega-Blast
 This card is a no-brainer. The largest pump after Savage Beatdown, it comes at a much cheaper price, but with an additional restriction of only being able to target support row characters. The synergy with Speed Demon, Second Chance Speedster is an added bonus, but really, it is all about getting the most bang for your buck, and Mega-Blast is a +4 ATK at the lowest threshold there is. Essentially, it plays as an unrestricted and very large pump in this deck.
Don’t get cute with Mega-Blast. If you have it, just put all characters with range into the support row. Most of your characters have range to begin with, so this isn’t difficult. Do not worry that you are telegraphing Mega-Blast to your opponent, as there is very little he or she can do with the information. Faces may be a finesse tool at times, but it is primarily a blunt weapon to club your opponent with (the recruits may involve finesse, but the attacking part doesn’t, really). You will lose games if you try too hard to hide that you have Mega-Blast. If you just leave everyone in the back to begin with, you will always be able to swing back when it is opportune to do so.
Finally, because Mega-Blast must target a support row character, when you’re planning to play Speed Demon and Mega-Blast that turn, recruit Speed Demon to your support row, then target him with Mega-Blast before formation. In this way, you can ensure that if your opponent has a Not So Fast effect of some sort, you can move Speed Demon to the front row. This might seem technical, but you need to be as tight as possible, particularly with such game-winning effects as Speed Demon plus Mega-Blast.
No Man Escapes the Manhunters
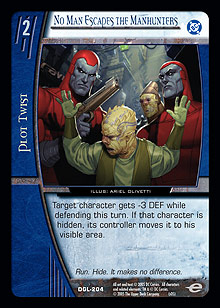 The next best pump after Mega-Blast, No Man Escapes the Manhunters has a number of advantages for this deck that are not obvious at first. Pulling out concealed guys is nice, but that’s not its most crucial use in this deck.
First, the fact that it targets opposing characters keeps your characters from being the victim of System Failure. Second, and perhaps most importantly, NMETM lasts for the turn, so it can be used on characters you may need to attack twice, namely Nimrod, Terra, and Hawkeye. While Nimrod needs no explanation, sometimes you need to send in a test attacker against Hawkeye or Terra, and you don’t want to waste a pump to just get stunned in response. No Man not only ensures the stun, it keeps its value even in the face of those characters’ dangerous abilities.
It is important to remember that this isn’t just an ordinary pump. When going in for maximum endurance loss, you need to make sure you are targeting a character with 3 DEF or higher to get full value from it. The nurtured instinct of most solid players is to hold onto pumps if they aren’t crucial to the stun. The nurtured instinct of great players is the planning of turns, so that pumps are used at the most appropriate times. Plan your kill turn carefully to get the most out of your pumps.
The Wrecking Crew
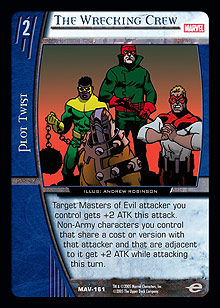 The Wrecking Crew is one of the cards that puts this deck over the top. Capable of spreading up to +8 ATK, TWC is lethal in multiples.
Why only play three, then? Unfortunately, the specter of Null Time Zone rears its ugly head. Ninety percent of players will not name The Wrecking Crew, but if anyone is ever savvy enough to do so, you will likely lose the game if you’re holding any copies. The fact that you have to form in a certain way for the card to be effective makes this a more likely occurrence than you would think.
Second, to get value from The Wrecking Crew, you want to be playing it for +6 ATK at the worst. For this reason, you do not want to play it early on in the game. There, a pump that merely ensures the stun will suffice. You want to save maximum damage for your kill turn.
Lastly, TWC can only target Masters characters. This can actually be problematic on early turns, particularly when you’re trying to get sufficient value from it. Early on, you may not have enough guys of the same cost floating around to justify using it, and sometimes the attack you have to make may not have a Masters guy in it at all.
After almost a thousand games in testing, most people came to the conclusion that three was the right number. Typically, you want the pivot for this card to be a flyer or character that isn’t dealing breakthrough. Obviously, a character that is attacking first is the best target for it. Usually Beetle and Yellowjacket are the targets at each recruit cost. Remember, you are forming before your opponent does when you use this, so form with the knowledge of his or her most dangerous threat and let the Crew go to work.
Flying Kick (and Savage Beatdown)
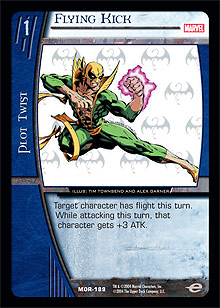 This slot could, and can, easily be substituted for Savage Beatdown, but each card brings different strengths and advantages to the table. Some players prefer to use a few Beatdowns, but I think Flying Kick is better, by the following reasoning.
Savage Beatdown is the biggest pump in the game. That said, it will nearly always be the card your opponent calls with Null Time Zone. This can be devastating. Its 4 threshold is also quite restrictive, because it can only be used on one turn when playing odds, your preferred initiative. However, this is not always a bad thing, as sometimes you are going to have to play on evens, and then you will need as much firepower as possible on turns 4 and 6. A +5 ATK is ridiculous and definitely makes life easier. Finally, Beatdown makes attacking back on your opponent’s initiative much more palatable, which opens up a lot of options for the kill turn.
Flying Kick is simply a safer choice. It doesn’t add as much firepower, for sure, but it comes online straight away and flies (!) under the radar of Null Time Zone. Once you start playing this deck, you will realize that the difference between +5 and +3 is massive, but the Kick has another major advantage. Flying Kick allows you some measure of redundancy with Speed Demon, turning him from average man into a tour de force. Before the move to more Speed Demons, Savage Beatdown plugged a lot of holes on the even initiatives. However, with more Speed Demons (your insurance for turn 6), Kick added to its more flexible early game status with a useful role in the late game as well.
Flying Kick complements two parts of the plan of this deck. First, gives the deck as much access to early, playable pumps as possible, which can be crucial in the early game against some decks that play high-DEF characters (She-Hulk, for example). Second, it allows Speed Demon to be large enough to win you games on even initiatives that would otherwise be impossible. In the end, Kick is the more flexible pump with greater utility, which is more important to the deck than the extra damage, even if it is sometimes sorely missed.
No Fear and Ole!
At various points in testing, people suggested No Fear and, to a lesser extent, ¡Ole!. These cards are red herrings for significant reasons.
The advantage of No Fear is that it can be used while defending. The thing is, you never want to use anything while defending. You are not looking to equalize a board with mutual stuns, you are looking to deal endurance loss—the most endurance loss you can. You need to accept that this deck does very little off-initiative, but that the pay-off on your initiative is so immense that it is worth it.
On non-initiative turns, you will want to attack back, but you will often want your characters like Beetle, Yellowjacket, and Songbird to be stunned so that you can replay them next turn. Additionally, the plot twists you use have to be used for maximum value. You don’t want to use No Fear to stun when you could be attacking with +3ATK for 2 more points of breakthrough.
Essentially, the point is that you will rarely care about the casualties on your side so long as you can keep dealing endurance loss to your opponent. Beetle/Yellowjacket and Hard Sound Construct allow you to build a board from nothing for one turn. Take advantage of this, and stun your characters whenever you can use these cards to recover your board. In the end, you need your opponent as low on endurance as possible. Where a curve deck seeks to gain board control for an inevitable infliction of lethal endurance loss, an off-curve combat deck skips the middle man. Just deal endurance loss, as often and as efficiently as possible.
Thanks for reading part three. Next, we will look at the matchups this deck is likely to come up against and my opinions on the posture you should take when facing them.