Welcome back to "Adjusting to Vs." After last time's math-intensive number-fest, I'm ready to kick back and never talk about averages again. Ever. For the rest of my days, until I die, a happy, average-less man. Luckily, the topic of today's fourth instalment is the initiative, and this is one mechanic that is far more concerned with finesse, quick thinking, and the ability to mentally shift gears at the drop of a remainder.
Get this math out of my head . . .
 Obviously, if you've read this far into the series, you are probably familiar with what the initiative is. Each turn, one player gets to act first in each phase, with the other player performing the same phase immediately after. Next turn, the roles are swapped, and the initiative continues to pass between the two players on a turn-by-turn basis until the game ends. In most game systems, it's advantageous to go first—you're usually the first to graduate one card to another, or the first to attack, or you get an extra piece of card advantage before your opponent can get it. However, in the Vs. System, the decision to accept the initiative for the first turn or to pass it to your opponent is a dynamically tactical one, highly dependant on the focus of your deck.
As a general rule, the player holding the initiative will be at an offensive advantage. He or she will be attacking first, and the opponent will only get to attack with whatever is not stunned or exhausted after surviving the clobbering. The player not holding the initiative can look at his or her situation in one of two ways: either being forced onto the defensive, or as being at a defensive advantage. Though both are true, I prefer to focus on the latter, as it's the one that players sometimes don't see. A game such as this one is one where knowledge equals power, and since going second means you get to see what your opponent opted to do before deciding what you will do, that's a definitive advantage right off the bat. There are other defensive advantages as well, but I'll go into those on a step-by-step basis.
Let's break down how initiative affects each phase of gameplay by looking at the advantages and disadvantages that each player has.
Draw Phase
The initiative is technically irrelevant in this phase, since both players draw simultaneously. This is the only phase where the initiative does not make a difference. Let's move on to the . . .
Build Phase
The build phase is where the initiative can make a huge difference for those in the know. It begins with the resource step, in which both players essentially have the same agenda—set whatever is the most helpful in the resource row. For the initiative-holding player, the ideal set is likely going to be something that can give an attack bonus or change a character's position to give an advantage. On a higher strategic level, certain key cards themed to the deck might be more important. The same is true for the player not holding the initiative, except instead of looking for the ideal attack-boosting card, he or she is probably more interested in a defense-boosting card or a card that recovers a character. The player without the initiative is going to be at a slight cerebral advantage. The player with the initiative will have to set first, and if the player takes a long time deciding what to set, that can speak volumes about both his or her hand and set resource. In contrast, the player without the initiative gets to decide what his or her set will be while the other person is deciding, and thus, the time taken to select what to set will likely be hidden. The player without the initiative will also know something is up if the opponent refuses to set a resource for the turn—this could make a statement about the opponent's deck (could be running a Brotherhood swarm), or it could make a statement about an opponent's hand (maybe it's just too good to throw any of it into the resource row).
 The recruit step is the first obvious and major advantage that the non-initiative player has. On the general levels, the advantage that the non-initiative player has is that he or she can see what the opponent recruited and act accordingly. However, in specialized cases, this can be even more useful. For instance, if you are using a low-stat card in the early game such as Franklin Richards or Alicia Masters, it can be a poor idea to play it on the first turn when you have the initiative. However, if your opponent has the initiative and does not have a 1-drop character to play, you know that your Alicia or Franklin will be safe until at least the next turn, whereupon you can stick a front row character between that character and the opponent. Alternatively, if a high-defense character like Destiny or Invisible Woman, Invisible Girl is called for, then you can go ahead and drop a character that can stand on its own on turn 1. The idea remains the same for the rest of the game, increasing in complexity but not straying from this root concept.
Lastly, the formation step continues this theme. If you're holding the initiative, you generally have the disadvantage in that your formation is probably going to completely telegraph your intentions to your opponent. By the same token, the non-initiative player can react to the opponent's formation in whatever way is needed: if the opponent set up for an all-out attack, one can create a defensive formation, or if the opponent has turtled due to a perceived disadvantage, you can form up in an attack-oriented formation. Unless you're Omeed—in that case you just form up in the opposite way you normally would and win the game.
Combat Phase
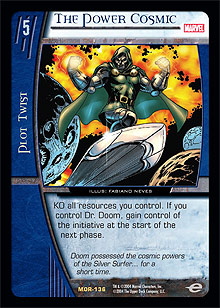
The combat phase and the attack step mark the realm of advantage for the player who currently has the initiative. When you're attacking while holding the initiative, you do so with full ranks; when you're attacking and not holding the initiative, you hope to mount an opportunistic offense with whatever you have left after being ravaged by your opponent. Games are often won just because one player got to attack before the other player did, decimating his or her chances of mustering a greater counterattack to pull out a win via negative-endurance comparison in the recovery phase. It's for this reason that The Power Cosmic is so prohibitively expensive to use—it not only allows you to go on the full offensive two turns in a row, but it also allows you to claim the right to first blood after the formation step. Your opponent is practically guaranteed to have the wrong formation to handle the crush of pain headed his or her way.
Recovery Phase
Last up is the recovery phase, yet another segment of the turn where the player not holding the initiative is going to have the advantage. It's just a case of information, similar to the build phase, only more pronounced: it's one thing to decide which character you will recover blindly, but it's another issue entirely to choose who to recover after you've seen your opponent's choice. And . . . uhh . . . the fact that the player without the initiative will probably have a wider range of choice in the matter than the player with the initiative is sort of a blood-stained silver lining as well.
Those are the general viewpoints of each player when it comes to turn phases with and without the initiative. Remember that the strategy of your deck will determine which turns you want to have the initiative on: if you tend to have statistically weak 1-cost characters, and especially strong characters that become recruitable on turns 2, 4, 6, and 8, then not beginning the game with the initiative is probably the best decision. Alternatively, if you have strong 1-drop characters and find your best characters are those that become playable on turns 3,5,7, and 9, then going first on turn 1 is going to be highly advantageous.
Prioritize the middle turns in this respect: if your deck is strong on turn 3 and turn 4, remember that the stat numbers get substantially bigger as the game goes on (and that turn 4 in particular is a strong turn, followed by the weaker fifth turn, as covered in part three of this series), and also keep in mind that you have a better chance of getting to turns 4, 5 and 6, than you do of getting to turns 7, 8, and 9. Playtest the initiative very carefully—the best decks are going to be the ones that do well regardless of when they have the initiative, but can really go into high gear on either the even numbered or odd numbered turns. This way, when you win the die roll and get to choose initiative, you'll have a potential lead in the game before the first cards are even drawn.
That's it for now! Hopefully I've once again helped to break down the more mystifying and intricate qualities of the Vs. System into Ant Man–sized pieces. As always, comments and questions can be sent to Jason@metagame.com.
Thanks for reading!